Sky Chart and Sextant
Make your own sky chart and sextant for the Astronomy Unit Study.
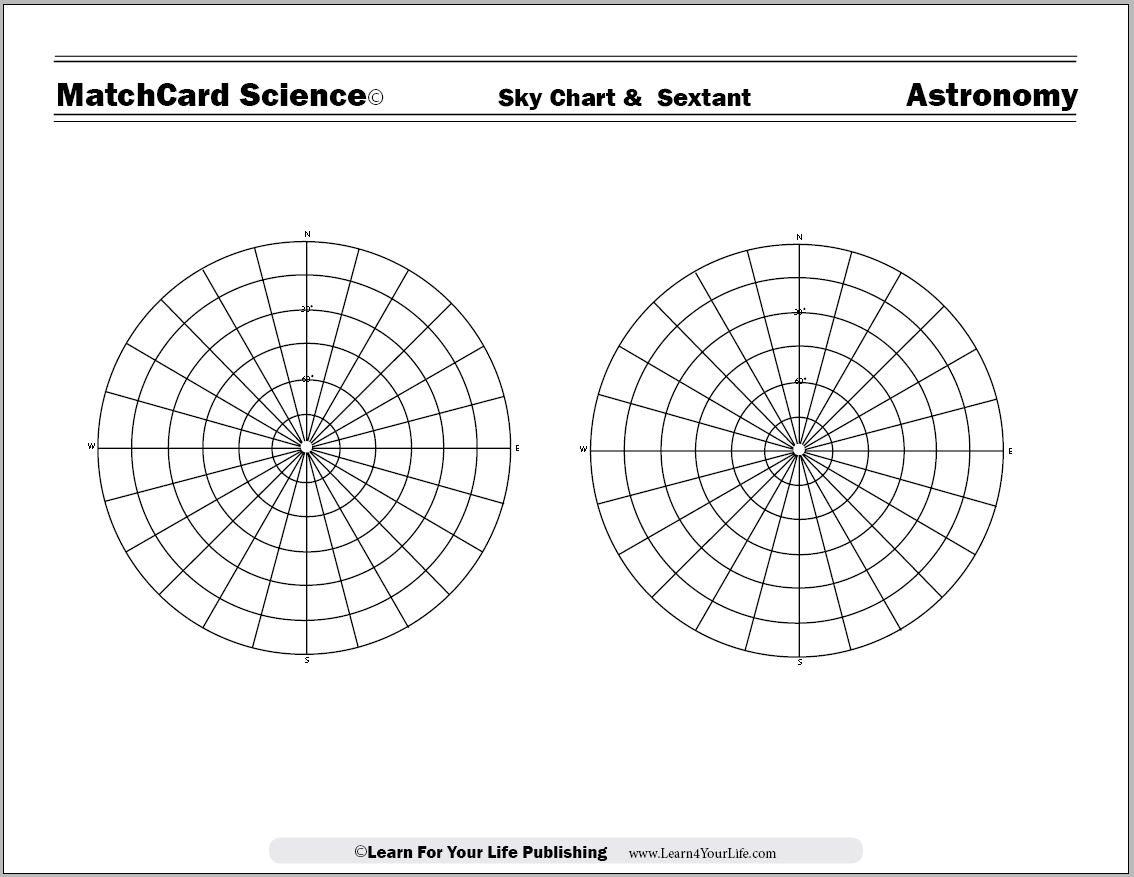
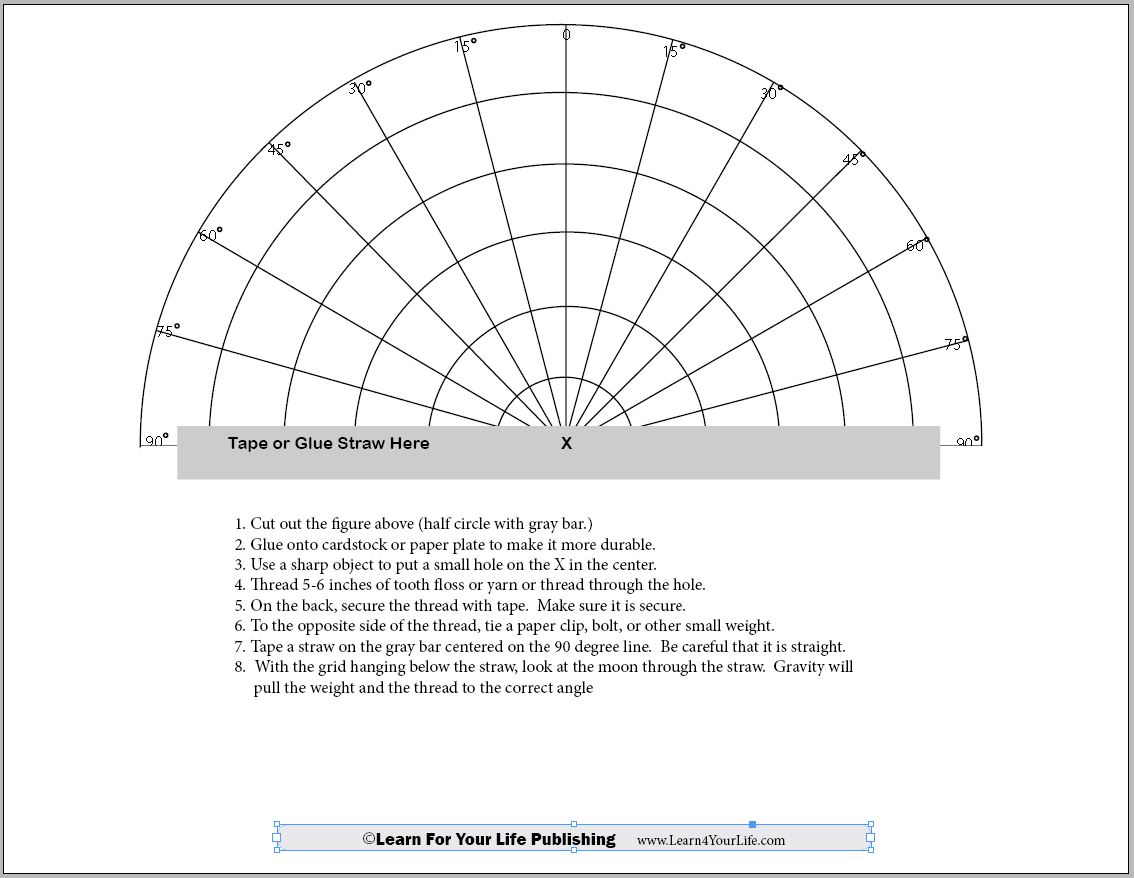
Free Download of Sky Chart & Sextant Below
How To Use A Sky Chart
Tracking the moon is a great way to get oriented to using and making sky charts. As you develop expertise charting the moon you will gain the ability to do more advanced charting with stars, constellations, and galaxies.
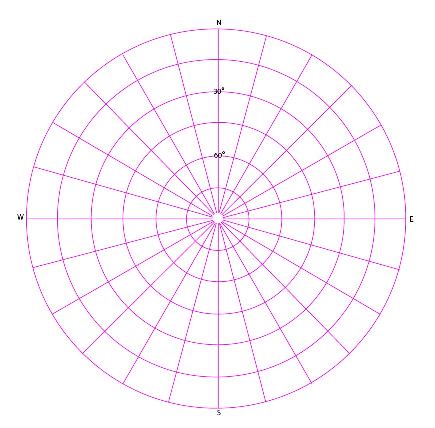
North/South Directions on a Sky Chart
Make several copies of the sky charts at the end of this book (pg 58.) The straight lines represent the angles for the directions N, S, E, W and in between. Become familiar with these. Take the chart outside during the day time and line up the sky chart with North. Now is a good time to introduce a compass if you have not done so before. Older students may be reminded that it is 90 degrees from North to East, from East to South, etc.The Horizon
Your horizon is represented by the outer most circle. The sun rises in the east and sets in the west. The movement of the sun over the day would start by the small E and end at the small west since we first see the sun on our horizon.First Exercise with the Sky Chart
Face North. Mark on the objects on your horizon in the correct location outside of the circles. Inside the circle represents the atmosphere above the ground.Dome Shaped Atmosphere
The atmosphere around you is a dome-shaped half sphere. If you have ever been in an arena with a dome over you, discuss that. If not, use one of these items to discuss domes:- Globe or other sphere cut in half (imagine it, don’t wreck your globe)
- A bowl that is perfectly shaped half sphere
- A small popper toy
Find Your Zenith
Your zenith is what is exactly over head of you from your location. Point straight up. That’s your zenith. If a star or moon was straight overhead in your zenith, you would draw it in the very center of the chart.90 Degrees from Horizon to Zenith
Point to your zenith with one hand and to the horizon with the other hand. Your two arms are at a 90 degree angle. On a sky chart the outer circle is the horizon or 0 degrees and the zenith is the very center and ninety degrees.Reviewing Degrees and Angles
Demonstrate that you can make a ninety degree angle (or any other size angle) in two dimensions. Point both hands to the very north, then move your right arm to point directly east. Your arms are ninety degrees apart. Point to the horizon with one arm and the zenith with another arm, and they are ninety degrees apart on a different plane.45o and 60o and 75o
Instead of pointing ninety degrees apart, point 45 degrees. This is the half-way point. Much of what we see in the sky will be between the 45 degree and 90 degree marks, particularly if you live in a city.Imagine dividing that 45 degree angle into thirds as you point into the sky. Try to point to the 60 and 75 degree angles. We will show you how to be a little more accurate next.
Find Angles with Your Fists
An instrument called a sextant(below) is the most accurate way to measure the angles between things in the sky, and we will discuss them later. But you have a handy gadget that you can use whenever you don’t happen to have a sextant with you: your hands. From one side of your fist to another side is approximately ten degrees.Here’s how it works. Make your ninety degree angle with your fists again, but this time point with your pointer fingers AND your palms up Your pointer fingers are ninety degrees from each other. From the tip of the your finger to the outside of the pinky finger on the same hand is about ten degrees. If you try it fist over fist you will get approximately nine fists in your ninety degree angle. That will work to measure the angles on either plane.
Mark the Moon On Your Sky Chart
Now that you know the directions and angles on your sky chart, it is time to use it with the moon. Note where you see the moon tonight. Find it’s location on your sky chart and draw it. Look for the moon several hours later. It changed! Mark that location. You may wish to mark this several times tonight.How To Make A Sextant
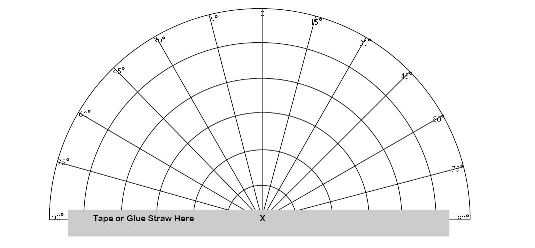
Making Your Sextant
To make your own sextant you will need:- The cut out on page 59 for each student
- Tape or Glue
- Paper plate or card stock
- 6 inches of string, yarn, tooth floss, or thread
- Paper clip or bolt to use as weight
- Straw (no bend or cut off the bended part)
Looking At Real Sextants
Check out images and prices of real sextants at a science store or on the internet. No, I don't expect you to buy a sextant for your study of the stars. But it is worthwhile taking the time to look at what a real sextant looks like. Maybe a little more accurate than using your fists or a paper plate and kitchen straw, don’t you think?Download Your Free Sky chart and Sextant


Click image to go to download.
Have Your Printer Ready
Using Your Sextant and Sky Chart
You can use your sextant and sky chart to chart these celestial objects: Join us in the Astronomy Unit Study and learn about these and more phenomenon in our great universe.MatchCard Science
How To Use MatchCards

Download the FREE MatchCard Science Instructor's Guide and see how MatchCards can make building their science knowledge base fun.
Astronomy Unit Study

Explore the universe with the MatchCard Science Astronomy Unit Study..
12 Science Unit Studies

Chemistry is only one of twelve complete unit studies for kids in 3rd to 8th grade.
Comprehensive objectives, hands-on projects, suggested science fair experiments, and the fun game-like MatchCards keep them interested in learning science. See all twelve MatchCard Science Unit Studies.
About Our Site
Hands-On Learning

