Sexual Reproduction In Plants
The sexual reproduction in plants worksheet lists the six steps in the reproductive process of flowering plants. It is from the MatchCard Science Botany Unit Study.
Free Download Below
Sexual Reproduction MatchCard
Objective: List the steps of sexual reproduction in plants in the correct order and describe each step.MatchCard: Download below.
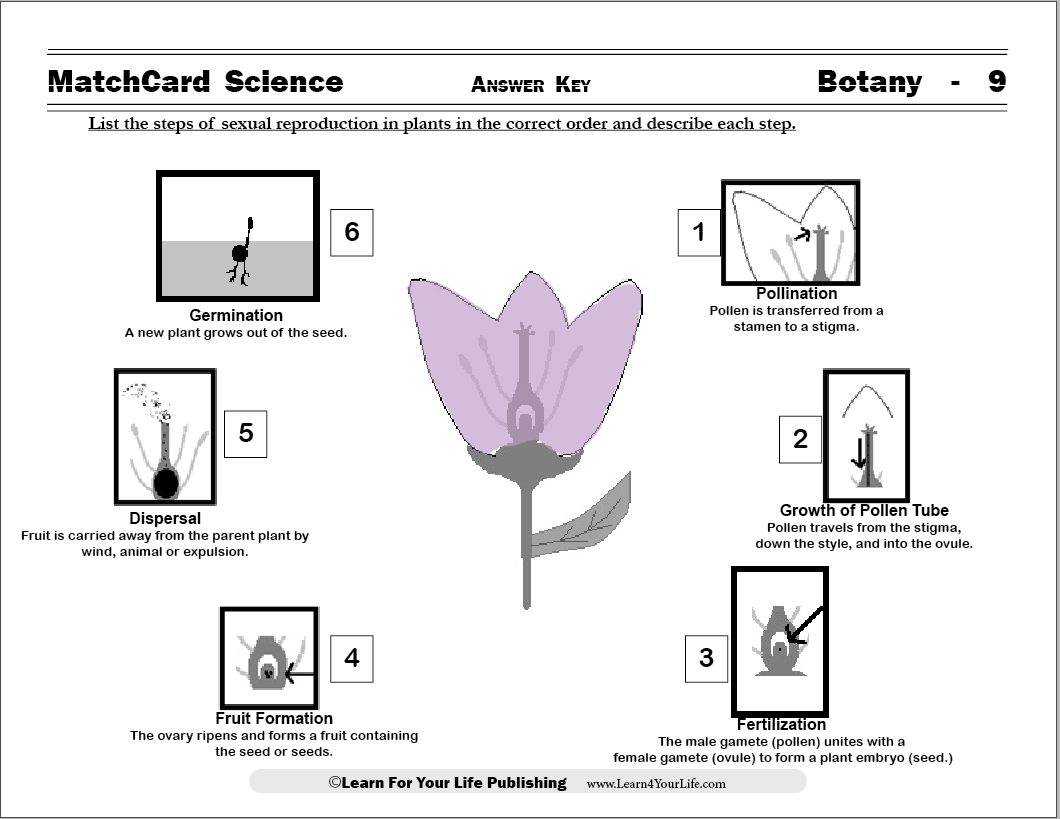
MatchCard Information Pieces give the terminology, description, and diagram of the six steps in the reproductive cycle. Students put them in the correct order on their MatchCard.
Botany Science Projects: Investigate the size and shape of the ovules of different flowering plants. Watch a seed germinate.

Asexual Reproduction for Plants
Botany MatchCard #9 covers asexual plant reproduction.
Download and Use the Plant Sexual Reproduction MatchCard


This is MatchCard #9 of the Botany Unit Study. Find more information on MatchCard Science below.
6 Steps to Sexual Reproduction in Plants

Pollination
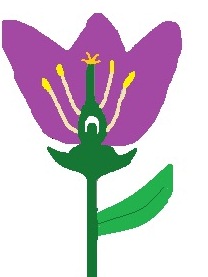
Pollen is transferred from a stamen to a stigma. The stamen is the male organ in a flowering plant and the stigma is the female part.It is helpful to review the parts of flowering plants.
Growth of Pollen Tube
A pollen tube develops to carry the pollen downward.Pollen travels from the stigma, down the style, and into the ovule of the plant.
Fertilization
The male gamete (pollen) unites with a female gamete (ovule) to form a seed. The seeds are the embryo of the plant.Fruit Formation
The ovary ripens and forms a fruit. The fruit may contain a single seed or multiple seeds.Seed Dispersal
The fruit is carried away from the parent plant by wind, animal or expulsion.Germination
If the seed is embedded in the right kind of soil, it will germinate. A new plant grows out of the seed. A stem reaches upward, and roots go downward into the soil.Teaching the 6 Steps of Plant Reproduction
Getting Ready to Teach
Cut apart all the information pieces prior to introducing this lesson. The Answer Key shows the name of each step, the description, and a picture of the location inside the plant as well as the order the steps occur in.Use Descriptive Information Pieces to Introduce the Content
Unlike other MatchCards, with this we are going to start by giving the students the description of each phase of the reproductive cycle. Place the description onto the MatchCard by the correct number, and ask the student to read what happens at that first step.Match Diagrams to Each Step
Now that the student has read the description of each step, they will match the diagrams to the MatchCard. Place the six diagrams that show where in the flower each step takes place in front of the student in a random order. As they read the description a second time, they will look at the diagrams and find the one that matches the description. See the answer key for correct placement.Name that Step
Finally place the information pieces with the name of each step randomly in front of the student. As they read each step again, let them identify which title correctly belongs to each step.Compare Sexual Reproduction in Plants with Human Reproduction
The steps of plant reproduction can be compared to human reproduction and familiarize students with the correct terminology for each.
Pollination > Insemination
Growth of Pollen Tube > Sperm Transport
Fertilization > Conception
Fruit Formation > Embryo
Dispersal > Travel through fallopian tube
Germination > Implantation & Gestation
Activities for Pollination and Germination
Pollination
Previously, students examined flowers to see if the were pollinated by wind or insects.Size and Shape of Ovules
Another activity is to examine the shape and size of the ovules of flowering plants. Use an exacto knife to open them very carefully. Draw a diagram of the size of the ovule compared to the flower. Carefully draw what you find inside.Germination
It is interesting to watch seeds germinate. Even experienced gardeners see the amazing feat of the seed as it slowly sprouts.Fill a glass or transparent container with potting soil. Place a seed between the soil and the side of the container. This will allow you to watch the seed as it germinates.
Keep the soil moist, so the seed can germinate. Watching the seedling in the damp soil makes it more obvious why most plants will not germinate in dry ground.
Use your science notebook to make drawings as the sprout grows. Write down the time in days since the seed was planted on your drawing.
MatchCard Science
How To Use MatchCards

Download the FREE MatchCard Science Instructor's Guide and see how MatchCards can make building their science knowledge base fun.
Botany Unit Study

Check out our entire Botany Unit Study with 11 objectives.
12 Science Unit Studies

Chemistry is only one of twelve complete unit studies for kids in 3rd to 8th grade.
Comprehensive objectives, hands-on projects, suggested science fair experiments, and the fun game-like MatchCards keep them interested in learning science. See all twelve MatchCard Science Unit Studies.
About Our Site
Hands-On Learning
