Anatomy For Kids
Cells to Systems
The first lesson in the anatomy unit study is cells to systems. Each lesson teaches more of human anatomy for kids in upper elementary and middle school.
Free Download Below
Introducing Human Anatomy For Kids
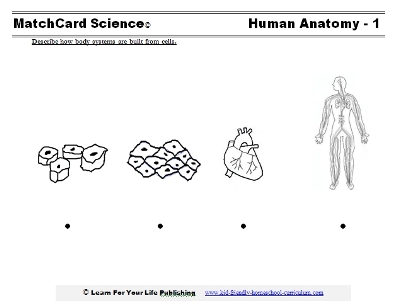
Objective: Describe how human body systems develop from cells.MatchCard: Download below.
The human body worksheet and ideas for projects are listed on the instructor's page and below.
Download the Cells to Systems MatchCard


This is MatchCard #1 of the Human Anatomy Unit Study.
Click the image above to go to the download page.
More Information Below on MatchCard Science and the Human Anatomy Unit Study.
Name That System
Let's start the human anatomy unit with a guessing game for kids. Ask the student(s) to list how many different systems of the human body they can on paper.If you have two or more students, you can make it a contest. Here is one of several ways to play the game:
- List nine human anatomical systems (below) on cards.
- Have them call out any system they can think of.
- The individual (or team) that calls out a system first gets the card.
- See who has the most at the end.
Write down how many they knew. At the end of the unit study do this activity again; and they will see how much they learned.
Major Systems
Here are the major systems that will be studied:- Digestive
- Respiratory
- Cardiovascular
- Skeletal
- Muscular
- Renal (kidneys and bladder)
- Nervous
- Reproductive
- Endocrine (hormonal)
Plan Your Anatomy For Kids Unit Study Project
Consider doing a project for the entire unit study. There are a total of 12 lessons.Students can make a drawing for each system. Here are some ideas:
- Make paperdolls (don't call them that with some of your guys.) Make the outline the today.
- Use rolls of brown or white paper to create life-size posters, tracing their body and adding organs in the correct place and size.
- Use transparencies to make clear overlays. Get a library book with overlays as an example.
- Make a collage or a poster of all the organ systems.
Organs, Please
Now the students will begin to identify the organs that make up each system. Today will focus on obvious organs they are familiar with.- Tape the index cards with the major systems to a door or wall.
- Let them think of different organs (eyes, heart, liver, etc.) and have them write them down on self-adhesive notes and stick to the card with the correct system.
- If you are playing competitively, give the two students (or groups) different color post it notes. (Alternative, small pieces of paper and two different colors of ink.)
Tissues
Ask what organs are made of.Some students may answer "cells" which is technically correct. Help them recognize, however, that all the cells of one system are not the same.
For instance, compare skin and eyes. The cells of the skin on your arm are similar to the cells on the skin of your legs. However, your eye is an organ. The cells in the front of the eye are not the same as the cells in the back.
Groups of cells that make an organ perform a particular job are tissues. The simplest way to conceptualize tissues is to think of a piece of an organ.
Cells
The cells are the basic building blocks of the body.If you have a microscope and commercially prepared slides, allow the students to look at slides of cells. Refer to any previous lessons they have had on cells, if it has been studied before.
A slide of human cells can be obtained by sliding the edge of a glass cover slide over the inside of the cheek to collect cells. Use a damp cotton swab to spread the cells on the middle of a slide.
If you do not have a microscope accessible at this time, look in books or do an internet search for interesting pictures of cells.
MatchCard Science
How To Use MatchCards
Download the FREE MatchCard Science Instructor's Guide and see how MatchCards can make building their science knowledge base fun.
Human Anatomy Unit Study
Download the entire Human Anatomy Unit Study
12 Science Unit Studies

Chemistry is only one of twelve complete unit studies for kids in 3rd to 8th grade.
Comprehensive objectives, hands-on projects, suggested science fair experiments, and the fun game-like MatchCards keep them interested in learning science. See all twelve MatchCard Science Unit Studies.
About Our Site
Hands-On Learning


